
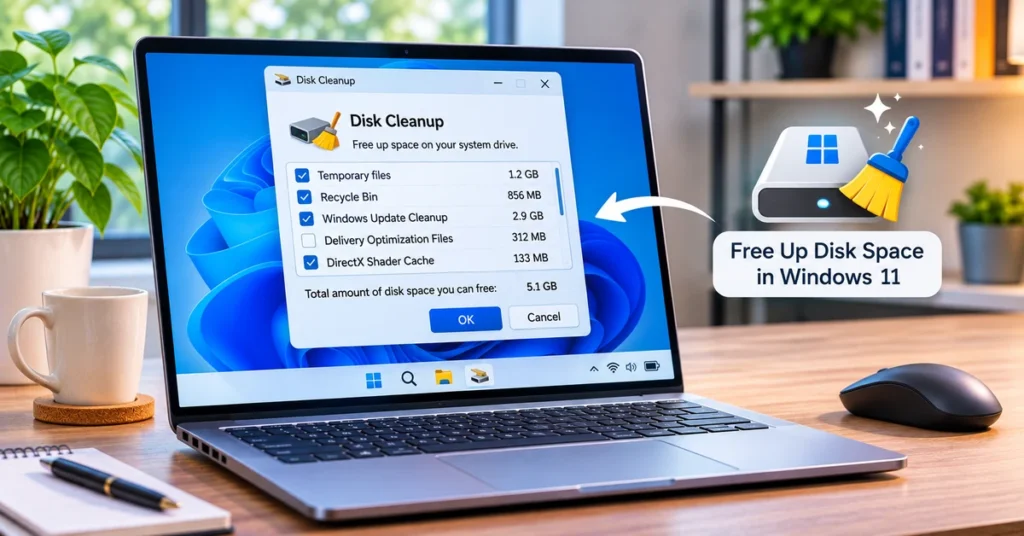
Running out of space on your Windows 11 PC can prevent updates from installing, make it harder to download files and leave you constantly managing what to keep. Before deleting personal files or installing a cleanup utility, check the storage tools already built into Windows.
Windows 11 includes Storage settings, Cleanup recommendations, Storage Sense and the classic Disk Cleanup utility. Each handles a different part of storage maintenance. This guide walks through the safest order to use them, explains what the cleanup categories mean and highlights files you should review before removing.
First, check what is using your disk space
Start by checking the free space on the drive where Windows is installed, usually C:. Open File Explorer, select This PC and look under Devices and drives. The capacity bar gives you a quick view of how much space remains.
For a more useful breakdown, open Settings → System → Storage. Windows analyses the drive and groups usage into categories such as Installed apps, Temporary files, Other, Desktop, Documents, Pictures and System & reserved. The exact categories shown can vary depending on your PC and the files stored on it.
Use this screen to identify the real space consumer. If Installed apps is large, uninstalling software you no longer use may help more than clearing a small temporary-files cache. If Videos or Downloads is large, review those folders instead of deleting system files.

1. Use Cleanup recommendations to find removable files
Cleanup recommendations is a good first cleanup step because Windows groups possible candidates and shows how much space each selection could free.
- Open Settings → System → Storage.
- Select Cleanup recommendations.
- Review the categories, such as Temporary files, Large or unused files, Files synced to the cloud and Unused apps.
- Expand each category and inspect the items before selecting them.
- Select the items you are sure you no longer need, then choose the relevant Clean up button.
Do not select every category automatically. In particular, check the Downloads folder and cloud-synced files carefully. A file that is no longer stored locally may still be important to you, and removing a local copy is not the same as deleting a cloud file, but you should understand the action shown before confirming it.
2. Delete temporary files safely
Temporary files are created by Windows and apps during normal use. Some can be removed to reclaim space, but the Temporary files screen can include several different categories with different consequences.
- Go to Settings → System → Storage.
- Select Temporary files and wait for Windows to calculate the categories.
- Read the description for each category and select only the items you want to remove.
- Pay particular attention to Downloads and Previous Windows installation(s) before selecting either.
- Choose Remove files after reviewing your selections.
Temporary files, thumbnails and some update-cleanup files are common candidates. The Downloads category can contain documents, installers, photos or other files you intentionally saved, so inspect it manually. If you recently upgraded Windows, Previous Windows installation(s) may include the Windows.old folder used to roll back to the earlier version. Removing it means you lose that rollback option. Microsoft notes that this option is generally available for a limited period after an upgrade, commonly 10 days.
3. Turn on and configure Storage Sense
Storage Sense can automate routine cleanup instead of making you remember to remove temporary files manually. It works on the system drive, normally C:, and can manage items such as temporary files and the Recycle Bin according to your settings.
Enable Storage Sense
- Open Settings → System → Storage.
- Find Storage Sense.
- Switch it on.
- Select Storage Sense itself to review its schedule and cleanup rules.
Choose what Storage Sense can remove
You can configure how often Storage Sense runs and how long items remain in the Recycle Bin or Downloads before they are eligible for cleanup. Choose settings that match how you use the PC.
- Temporary files: Allow Windows to remove unnecessary temporary files.
- Recycle Bin: Choose how long deleted items remain before automatic removal. Do not rely on the Recycle Bin as long-term storage.
- Downloads: Set a retention period only if you are comfortable with Windows removing older files that have not been opened. If you keep important files in Downloads, leave this cleanup disabled.
- Cloud content: Where supported, choose when inactive locally available cloud files can become online-only. Files marked Always keep on this device are treated differently.
- Run schedule: Select a cadence that suits your storage needs, or let Windows run it when disk space is low.
Storage Sense settings and defaults can vary by Windows version, account and organisation policy. Review the actual options on your PC rather than assuming a particular schedule is enabled. It is not a substitute for backing up important files.
4. Run the classic Disk Cleanup utility
Disk Cleanup remains useful for reviewing temporary and system files. It is especially handy when you want to inspect cleanup categories in a familiar desktop dialog.
- Open Start or taskbar Search and type Disk Cleanup.
- Open the utility and select the drive you want to clean, usually C:.
- Wait for Windows to calculate the amount of space that can be freed.
- Review the file categories and select the ones you understand and no longer need.
- To see additional system categories, select Clean up system files, choose the drive again and wait for the scan.
- Select OK, then confirm with Delete Files.
Disk Cleanup can show categories such as temporary files, thumbnails, Delivery Optimization files, Recycle Bin and Windows Update cleanup. The categories available depend on the system. Read the description for a selected item before deleting it. As with Cleanup recommendations, deleting Previous Windows installation(s) removes the ability to roll back to that earlier Windows version.
5. Find and move large personal files
Windows cleanup tools cannot decide which of your personal files are valuable. If Videos, Pictures, Documents or Downloads use most of the drive, review those folders yourself.
- Open File Explorer and choose a folder such as Downloads, Videos or Pictures.
- Change the view to Details.
- Use the Size column to identify large files. If needed, right-click an empty area and choose Sort by → Size.
- Open files before deleting them so you know what they contain.
- Move files you want to keep to an external drive or another storage location with enough capacity.
- Empty the Recycle Bin only after confirming that you do not need the deleted items.
If you are reorganising files in File Explorer, our guide to customising the Windows 11 File Explorer context menu explains how to make common file actions easier to reach.
6. Uninstall apps and games you no longer use
Large applications and games can take up much more space than temporary files. Open Settings → Apps → Installed apps, sort the list by size where available, and review the programs you no longer need.
Select the app’s menu and choose Uninstall when available. Do not remove drivers, security software, system components or unfamiliar work-managed apps simply because they appear large. If you are unsure what an app does, look up its publisher and purpose first.
7. Use OneDrive Files On-Demand for cloud files
If you use OneDrive, Files On-Demand can reduce the amount of local disk space used by files that are stored in the cloud. A file can appear in File Explorer without the full contents being downloaded permanently to the PC. When you open an online-only file, Windows needs an internet connection to download it.
For files you need without internet, use Always keep on this device. For files you rarely use and are comfortable accessing online, use Free up space where available. Check the status icons and make sure important work is synced before changing availability.
What you should not delete to free up space
Avoid aggressive manual cleanup. Do not delete random folders from Windows, Program Files, ProgramData or AppData just because their names are unfamiliar. Do not manually remove system component folders such as WinSxS, and do not use registry cleaners or unknown “PC booster” utilities as a shortcut.
Also avoid deleting personal files you have not backed up. If a cleanup option mentions Downloads, previous Windows installations or cloud files, pause and read the description. For important data, create a backup before making large changes. Our guide to backing up a Windows 11 PC and restoring it on a new computer explains practical backup options.
How much space should you try to free?
There is no universal amount that every Windows 11 PC needs to keep free. It depends on the drive’s capacity, the apps you use, pending updates and the size of your personal files. The practical goal is to create enough room for normal use and upcoming updates, then monitor the Storage page rather than chasing a fixed number.
If the drive fills up again quickly, check which category grows after cleanup. A rapidly expanding Downloads folder, app cache, video library or cloud sync folder needs a different solution from a one-time temporary-file cleanup.
Common Windows 11 storage problems
Storage Sense is missing or greyed out
Check that you are viewing Settings → System → Storage and that Windows is up to date. On a work or school computer, an administrator may control storage settings. Some options also depend on the Windows version and account configuration.
Windows says there is not enough space for an update
Open Storage and review Cleanup recommendations and Temporary files. Move large personal files to another drive if needed. Microsoft also documents using external storage to help complete some Windows updates when the device does not have enough free space.
Free space disappears again after cleanup
Check the Storage breakdown again after a restart and normal use. Look for large app data, downloads, cloud sync folders, temporary files or a rapidly growing cache. If the Temp folder repeatedly fills with Microsoft Store app package files after cleanup, Microsoft provides additional troubleshooting steps for resetting the Store cache and running the Windows Update troubleshooter.
Can I delete Windows.old?
You can remove Previous Windows installation(s) through Windows Storage or Disk Cleanup when the option is available, but do so only after deciding you no longer need to roll back to the previous Windows version. Once removed, that rollback option cannot be used.
Frequently asked questions
What is the fastest way to free up space in Windows 11?
Start with Settings → System → Storage → Cleanup recommendations. Review the suggested categories, then remove temporary files you recognise. Large personal files and unused applications may provide more space if they are the main cause of the shortage.
Does Storage Sense delete my Downloads folder?
Not unless the Downloads cleanup option is configured. Review the retention setting carefully before enabling it, especially if you store important files in Downloads.
Is Disk Cleanup still available in Windows 11?
Yes. Search for Disk Cleanup from Start or taskbar Search. The utility can review temporary files and additional system cleanup categories.
Is it safe to delete temporary files?
Many temporary-file categories can be removed safely, but review the category descriptions. Downloads and Previous Windows installation(s) can have consequences, so do not select them without checking first.
Will freeing disk space make my PC faster?
Freeing space can help when a nearly full drive is interfering with normal operation or updates. It does not guarantee a noticeable speed increase if the real cause is limited memory, a background app, an ageing drive or another performance issue.
Final checklist
- Check the Storage breakdown to find what is using space.
- Review Cleanup recommendations before removing files.
- Configure Storage Sense carefully, especially Downloads and cloud content.
- Use Disk Cleanup for additional temporary and system file categories.
- Move or back up large personal files before deleting them.
- Uninstall only apps you recognise and no longer need.
- Recheck free space after cleanup and monitor categories that grow again.
Windows 11 already includes several useful tools for managing disk space. Start with its Storage page, review each suggested cleanup item and automate only the tasks you are comfortable with. A careful review is safer than deleting unfamiliar folders or relying on third-party cleanup apps.